You’ll gain control and confidence at the cutting board by learning a few simple, repeatable motions and safety habits. Mastering basic knife skills—grip, proper posture, the guiding claw, and consistent cuts—lets anyone prep ingredients faster and more safely.
They practice steady, efficient techniques that make slicing vegetables, herbs, and proteins predictable and even. This article breaks down essential knife techniques and best practices for beginners into clear steps and practice drills so they can build reliable habits from the start.
Essential Knife Techniques and Best Practices for Beginners
Beginners should learn how to pick the right blade, adopt secure grips, and practice core cuts with consistent technique. Safety, knife maintenance, and using the right cutting board keep work efficient and reduce risk.
How to Choose the Right Knife for Each Task
Select knives by task: use a chef’s knife (8–10″) for most chopping, slicing, and dicing; a paring knife (3–4″) for peeling and small detail work; a santoku (5–7″) for thin slicing and push cuts; a utility knife for medium tasks; a serrated knife for bread and tomatoes; and a carving knife for roasts. Match blade length to the ingredient size to control movement and speed.
Consider blade profile and weight: a curved chef’s knife favors a rocking motion, while a straighter santoku knife favors a push-cut. Test the handle for a secure, comfortable fit—slip-resistant material and a balanced blade-to-handle feel reduce fatigue. Store knives in a knife block, magnetic strip, or blade guards to protect edges and fingers.
Fundamental Knife Grips and Hand Positions
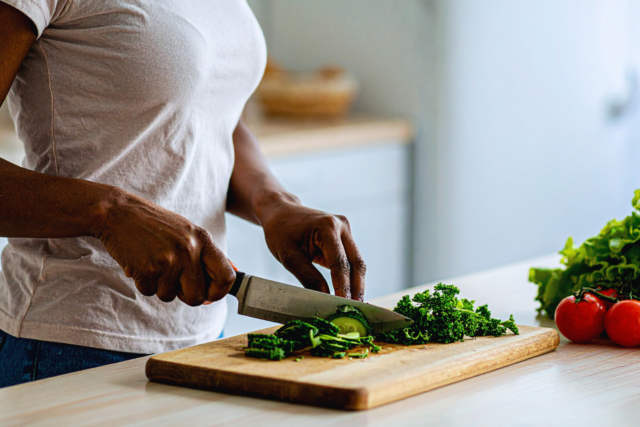
Teach the pinch grip for control: pinch the blade where it meets the handle with thumb and index finger; wrap the remaining three fingers around the handle. Use the claw grip with the guide hand: curl fingertips under and rest knuckles forward to guide the blade and protect fingers.
For long slicing, use the chef’s grip (full hand on handle) when precision is less critical. Keep the wrist aligned and elbow slightly bent to maintain stability. Maintain consistent finger placement and wrist angle to build muscle memory and repeatable cuts.
Basic Cutting Techniques: Slice, Dice, Chop, and Mince
Slice: draw the blade smoothly through the ingredient using either a single push-slice or a gentle rocking motion; aim for uniform thickness to ensure even cooking. Dice: start with uniform slices, stack or rotate into batons, then cut across to create cubes; keep the guide hand steady.
Chop: use a controlled up-and-down or rocking motion for larger pieces; focus on rhythm rather than force. Mince: gather pieces and use a rocking motion with the tip anchored and the heel lifting slightly; repeatedly pass the blade until pieces reach the desired fineness. Maintain tip contact and consistent motion for efficiency.
Mastering Popular Knife Cuts: Julienne, Chiffonade, and Brunoise
Julienne: cut vegetables into 1/8″ (3 mm) thin matchsticks. Begin by trimming to a flat surface, square the ingredient into a rectangle, slice into 1/8″ slabs, then stack and cut into sticks. Even thickness yields even cooking.
Chiffonade: stack and roll leafy herbs or greens, then slice thinly to produce fine ribbons for garnishes or salads. Use a sharp chef’s or santoku knife and long, smooth strokes to avoid bruising delicate leaves. Keep the guide hand steady to control the slice width.
Brunoise: produce small 1/8″ cubes by first julienning into matchsticks, then turning and dicing across. Accurate brunoise depends on consistent julienne thickness and a steady guide hand. Use brunoise for garnishes, sauces, and flavor distribution in small-bite dishes.
Knife Safety and Handling Tips
Always cut away from the body and never try to catch a falling knife. Keep blades sharp—dull knives need more force and slip more easily, increasing the risk of cuts. Store knives securely in a knife block, magnetic strip, or with blade guards to prevent accidental contact.
Keep the work area dry and clear of clutter; wipe up spills immediately to avoid slippage. When passing a knife, set it down and point the handle toward the other person or hand it handle-first. Use proper footwear and avoid distractions when cutting.
How to Use Cutting Boards and Supporting Tools
Choose a stable cutting board: wood or plastic boards provide grip and protect edges; heavier boards resist sliding. Place a damp towel or non-slip mat underneath to secure the board. Match board size to the task to allow full-range knife motion.
Use bench scrapers to transfer cut items and keep the board clean. Use a mandoline or food processor for very thin or uniform slices when precision speed is required, but wear cut-resistant gloves and follow manufacturer safety instructions. Clean boards and tools promptly to prevent cross-contamination.
Knife Maintenance: Honing, Sharpening, and Storage
Hone daily with a honing steel to realign the edge; hold the steel vertically and draw the blade at a 15–20° angle on each side for 5–10 strokes. Sharpening when honing no longer restores a keen edge—use a whetstone, guided sharpener, or professional service. A 20° edge suits Western chefs’ knives; slightly smaller angles suit Japanese-style blades.
Dry knives before storage to prevent corrosion on carbon steel. Store in a knife block, on a magnetic strip with secure mounting, or use blade guards for drawers. Avoid dishwashers: heat and detergents dull blades and damage handles.
Developing Consistency and Speed Through Practice
Practice basic cuts on forgiving vegetables like carrots and onions to build even slices and uniform dices. Set a timer for short drills: five minutes focused on julienne, five on brunoise, and repeat to build speed without sacrificing accuracy. Track progress by measuring piece sizes and aiming for consistent dimensions.
Work on grip and posture: maintain pinch and claw grips, stable board placement, and relaxed shoulders. Gradually increase the pace only when cuts remain uniform. Record slow-motion video occasionally to spot inefficiencies in motion and correct technique.